So, here I'm putting the back plywood panel on; which covers the soundbox, but not the keyboard area.
The plywood is only 3/16" thick. This is a big part of my concept, "beams and stressed fabric", like an (oldschool) airplane wing. The plywood won't contribute any twist-resistance or compression-resistance on its own, but by enclosing the frame "triangles", I hope the resulting boxes will be greatly strengthened against critical deformation modes, by the good tension-resistance of the plywood. The soundboard will be the same thickness and material, attached on the other side. Normally the back would probably be thicker than this, but I both wanted to fully validate the "stressed fabric" concept, and to end up with as light as possible of an instrument, as a practical matter (this prototype, assuming it works, will become my own working instrument which I may end up transporting and carrying around quite a bit).

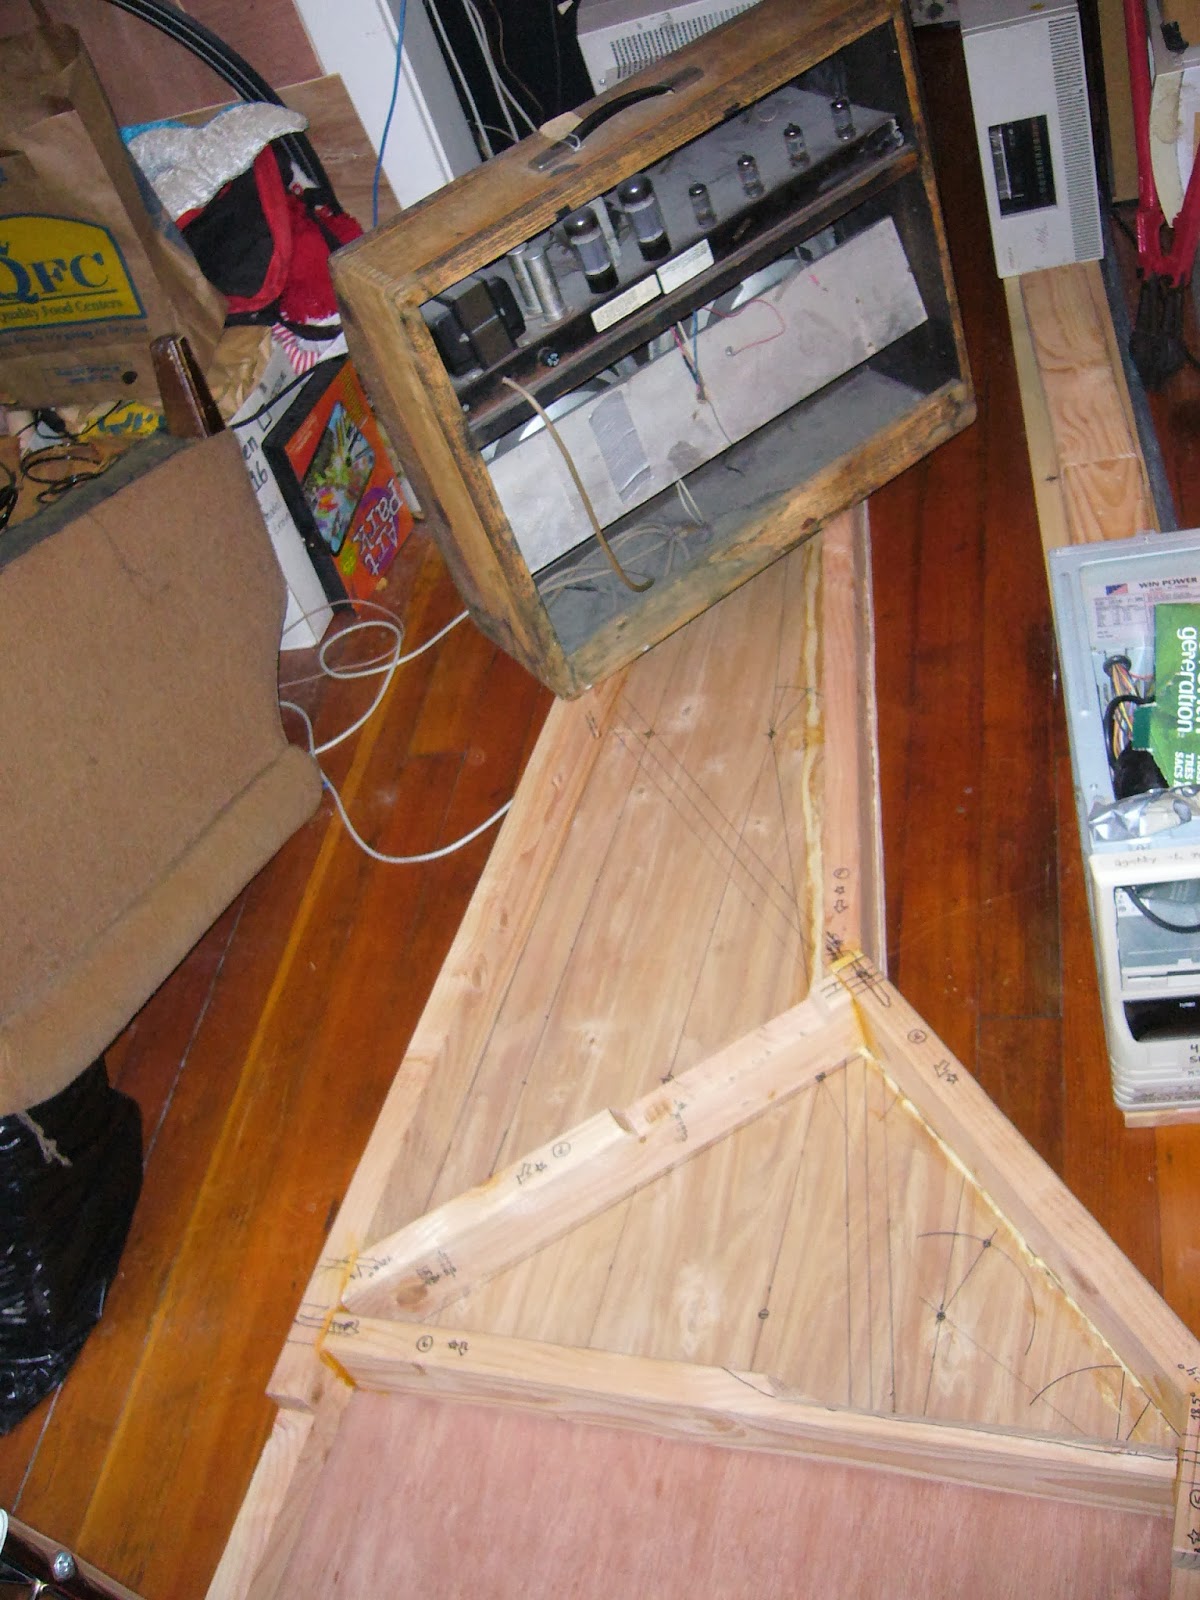
The back is glued-and-screwed, my usual procedure to avoid the need for (explicit) clamps...

...and then I've weighed down the tail especially firmly to flatten out the twist as mentioned before. You can see my tube guitar amp (much better suited to this use than a solid-state amp of equal power!), and beyond it, just the corner of the Sun monitor, a heavy beast with a nice big flat square base, perfect for the job. I'll still need to machine the outer faces of the timbers, somehow, to make them sufficiently flat and vertical, but at least the frame will be in one plane.
I will let the frame rest in this weighted condition for a number of days: not only to let the glue dry, but also to at least get a start on drying out the moisture from my "wet pack" experiment on the spine piece. Which was pretty ill-advised, I now think, but the "data" from observing the reaction of the wood is probably worth the damage in the long term!
Meanwhile, I've been continuing notebook-work on the action design. I think I will need a deeper floor under the action, than the rest of the instrument (i.e., the soundbox). This works out, because the side-lumber (1x6) that I have are too short to reach the whole length on the long (spine) side, anyway: so there was going to be a seam regardless. Now, this vertical seam will occur at the end of the soundboard, as the lumber changes from 1x6 to, probably, 1x8 (but possibly trimmed down). The line of the top will remain the same, but the bottom will "bulge" downwards a bit, under the wrestplank and keyboard: perhaps by another inch. I don't think it will hurt the aesthetics any; indeed, visually I think it'll look good to have a little more "mass" at the keyboard end, balancing against the general long-and-thin profile.
I've been refining the design of the dampers. I am back to dampers-from-underneath, after briefly considering dampers-from-above. The dampers will have (mild) spring tension holding them against the strings, and the keylever will pull them away under tension; i.e., the spring force will be added to the playing force of the key, not subtracted as in some of my past iterations of this design. I had been planning a set of secondary levers, with all the attendant guides and whatnot, to transfer the keylever motion to the dampers. The issue is that I want the dampers to move only a small distance, whereas the end of the keylever with the striker, right next to the damper, moves quite a lot, probably about 3x the player's keystroke distance. So even if it was to be dampers-from-above, I wouldn't want to use the simple approach of having the keylever directly lift the damper: that would be too much motion, needlessly fast, too much inertia, and too much sensitivity to friction in the damper guides. So levers would have let me select a driving point on the keylever, closer to the pivot center, with less motion and greater leverage to overcome friction. But, even very lightweight levers would (quite possibly) have problems with resonance and/or lag, especially during rapid repeats, which could lead to a surely-undesirable jerk effect (high third derivative).
So now, latest version, I plan to simply use nylon monofilament to transfer the motion, with no secondary levers. The damper will be held against the string as mentioned, under spring force. The monofilament line will run downwards from the bottom corner of the damper wire, to a "pulley" on the floor of the action assembly, then horizontally across to another "pulley" on the floor, located closer to the key pivot-point, and then up to the keylever. The position of the second "pulley" can be shifted forwards or back arbitrarily, to select the leverage point anywhere along the keylever. I'm thinking probably 1:1 with the keystroke, if the striker is 3:1. But maybe even reduced from that, like 0.5:1. I am planning a very shallow key-dip, maybe about 1/4". The damper motion wants to be small; but the issues with making it too small are that there must be enough motion to reliably get the (compressible and fuzzy) felt fully out of the way of the strings, especially in the bass where the vibrations are larger; and also, there must be enough *more* motion than the minimum, so that the transition to damper-open happens well above the bottom of the keystroke (ideally about halfway, I think). This is all to minimize the amount of extra force or friction perceptible to the player when the dampers are operational, vis a vis when the sustain pedal is down, while at the same time allowing a reasonably robust spring force on the damper itself so that it will damp quickly and effectively -- especially because I have made the damper and striker positions so close to the nut, aiming for a bright and nasal voice.
Continuing the saga of the monofilament. After passing through a hole in the side of the keylever, which defines the leverage point, the monofilament does not terminate right there, but rather continues all the way forward to the player's end of the keylever. There, it terminates at an eyelet which behaves like the tuning pins on the wrestplank: by turning the eyelet, the length of the monofilament can be changed, which adjusts the rest position of the damper. (This can be used both to adjust the dampers for consistent action, and to compensate for any stretch in the monofilament.)
The sustain pedal (and handstop) operates by pressing against the damper springs independently of the monofilaments; thus, the lines go slack when the pedal is active. Care must be taken that the lines are arranged so they cannot snag or interact with each other in any way, or otherwise get off their intended tracks, when they go slack thus. Which brings up the "pulleys". I've been putting quotes around the word, because I think that instead of actual pulleys with moving parts, I can probably just use continuous, shiny, circular-section rails (i.e., small pipes), one each to effect all of the "pulley 1"s and the "pulley 2"s. The monofilament lines will simply slip around these shiny tubes, making a right angle at each one, hopefully moving with low friction.
No comments:
Post a Comment